Last Updated on June 2, 2022 by Igor Karni

Though riding an electric bike can provide a great workout for the whole body, sometimes a common result of it can be hip pain of varying severity.
However, this is an issue that, typically, can be easily managed.
This article will outline the various factors that are the most associated with causing hip soreness and pain for e-bike riders, as well as common methods to help reduce, prevent, and manage the pain.
Hip pain while riding an e-bike – common causes
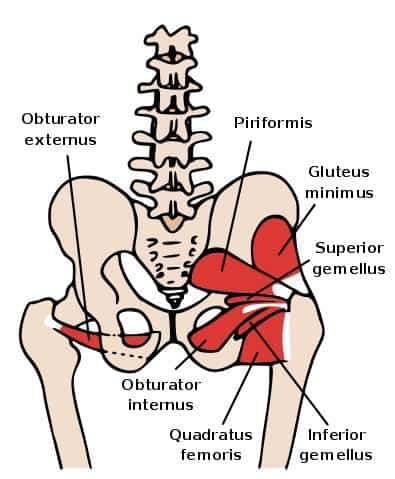
Typically, the area that hurts the most after cyclists ride their e-bikes is the hip rotator muscles, more specifically the piriformis (source), which is located in the gluteus maximus (buttocks) near the top of the hip joint. The hip rotator muscles extend from the tailbone to the top of your thigh.
The piriformis is the muscle that helps rotate or open one’s leg outwards. Since cyclists do not need to use this muscle while cycling (rather, your hips stay in a fixed position while completing a cyclical rotation), the piriformis is at risk of becoming weaker.
This causes your hip rotator muscles to tighten, thus leading to pain in your deep glute area. Additionally, if this specific muscle becomes overworked or stressed, it can put pressure on the sciatic nerve (source). Pressure on the sciatic nerve can result in leg and hip pain and can potentially lead to sciatica.
Read also: Can I ride an electric bicycle with knee problems or arthritis? And, Can I ride an electric bicycle with sciatica?
Inactivity within the hip rotator muscles can lead to decreased flexibility and range of motion. The hip flexors, specifically iliopsoas (where the top of the thigh meets with the front of the pelvis and glutes) are also affected in cyclists (source).
Though it is commonly acknowledged that the legs take on the brunt of the work when riding an e-Bike, bear in mind that your glutes are one of the main powerhouses at work as well. Your glutes are needed to propel the downward motion when completing the cycling motion, at which point the thighs take over.
Then, the rotation is completed by the knees coming back up, which is also controlled by the hip flexors. So, your hip muscles play a bigger role in cycling than you may think.
Tightness in the hip flexors can also be caused by an overly bent-over posture. This position can compress the anterior (front of hip) muscles (source), a result of which is overloading the iliopsoas. Riders also need to ensure that their knees are properly being brought to the top phase of the pedal rotation.
If this is being done improperly, your upper body will overcompensate, which will unnecessarily put stress on the lower back and hips. As well, riding your e-Bike at too high of intensity too quickly can lead to muscle tightness in the hips.
Read also: Are electric bikes good for exercise? And, Can I use an e-bike to get fit or for weight loss?
Other hip-related pain can be a result of bursitis, piriformis syndrome, myofascial pain, tendinopathy (“snapping hip syndrome”), hernia, and arthritis. These can either be pre-existing conditions or can be potential results of consistent hip pain from e-Biking.
Hip pain prevention, treatment, and e-bike adjustments
There are many ways to prevent and treat hip pain and soreness. Some factors rely on adjusting your e-Bike fit, and some rely on riders actively strengthening their hip muscles both on and off the e-Bike.
A few ways to strengthen your glutes and hip flexors is to gradually increase cadence and mileage intensity when riding your e-Bike, as opposed to jumping in too quickly. Increasing either mileage or cadence too quickly can lead to hip damage or pain, since your muscles may not be used to the pressure of the activity.
For reference, the cadence is the pedaling rate (revolutions per minute, or RPM), and the mileage is the distance you are covering on your e-Bike. Consider purchasing a cadence sensor for your e-Bike, as it will allow you to more accurately measure your cadence while riding.
Riders should also try going at a higher and more consistent cadence, as opposed to switching gears too often, as doing so can lead to muscle fatigue more quickly and thus can put pressure on the hips.
Read also: How to use gears on an electric bike (mechanic and electric)? And, How to switch electric assistance levels on an e-bike?
One of the great features of e-Bikes is the pedal-assist, which you can increase or decrease accordingly. If you find your glute muscles are getting sore or tired while riding, be sure to make use of the pedal-assist feature, heightening the electric assist to ensure that you are not putting too much stress on your body while you ride.
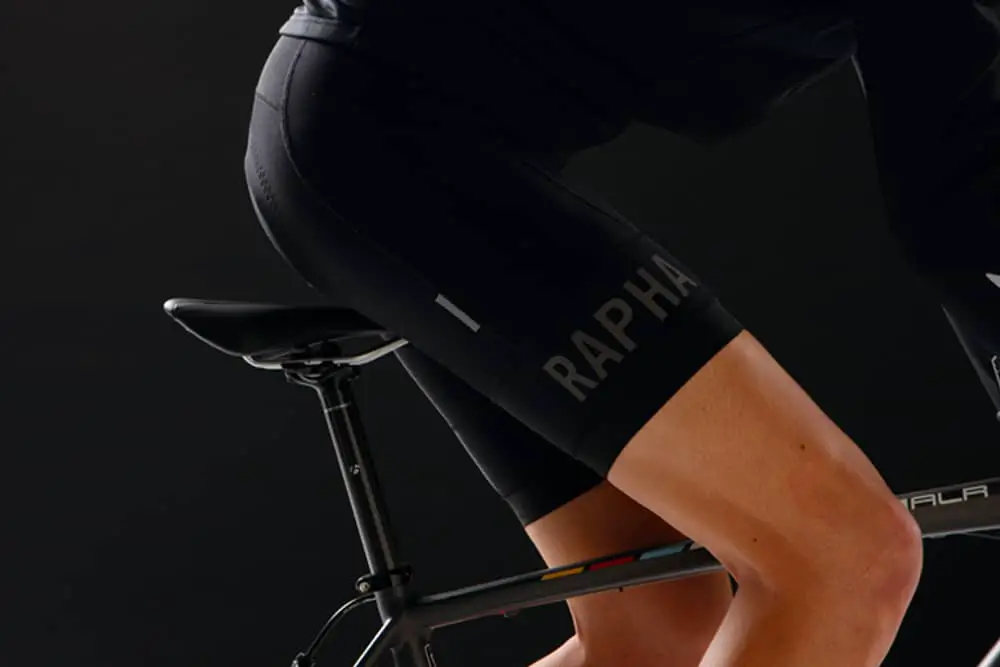
Next, make sure that your e-Bike is properly fitted to your body in order to optimize hip joint function and riding comfort. The posterior (back) hip muscles, such as the gluteus maximus, are the main powerhouses that propel the pedaling action and can become quickly overloaded especially when your e-Bike is improperly positioned to your body.
To ensure your glutes are taking on the appropriate load, consider your e-Bike’s handlebar size and position to ensure that your body does not exceed your range of hip flexion (source) once you get to the top of your pedal stroke.
For example, make sure that your saddle height is not too low, as a low seat will require more hip flexion range (which may be overstretching it, depending on your hip flexibility). Adjust your handlebar height to ensure you are not bending too far forward while riding, as bending too much will put unnecessary pressure on your back, and in turn, glutes. It is recommended to adjust your handlebars between 0-10 CM below your seat height.
Read also: How to select the right electric bicycle size? And, Which electric bicycle to buy? Making your educated e-bike selection choice.
Additionally, make sure your saddle is either softer or more customized to your backside if you find it is currently too hard. If needed, invest in a seat cushion, as this will reduce friction. Its prevention from direct contact will also provide better shock resistance, thus putting less hard impact on your hips.
Strengthening and stretching helps prevent hip pain
Strengthening and stretching your hips and glutes will help with hip flexibility, thus lowering the likelihood of tight and pained hip muscles after e-Biking. Regular strengthening will also give you a more powerful and balanced foundation when you ride, with minimal strain. Your range of motion will also be improved. It is typically recommended that riders stretch and condition their hips three times a week for maximal results.
The most common stretch for your piriformis muscle, which is the muscle that gets the least amount of workout while cycling, includes lying on your back with both knees bent and feet flat on the floor.
Cross your left leg over your right so that your ankle is resting on your right knee. Next, bring your right leg towards your chest by bending the hip to stretch your piriformis (it is recommended that you hold onto your hamstring with both hands to better support your stretch.)
Across body stretch
Another is the across body stretch (source), wherein you lie down and pull your right knee across the chest toward your left shoulder. With your left hand, pull your right ankle to your left shoulder, and hold for 30 seconds. Repeat on the other side.
Side plank with overhead reach stretch
Next is the side plank with overhead reach. From a lying position, shift to your side. Stack one foot on top of the other, and lift yourself up on your left forearm. Ensuring your body is in a straight line from head to toe, lift your right arm up and hold for 30-60 seconds. Repeat this on the other side.
Read also: Most common pains when riding an electric bicycle, and how to prevent and cure them.
Low lunge stretch
There is also the low lunge (source), which is performed either standing or kneeling and is optimal for hip flexors. To do so, start on all fours. Then, step your right leg up between your hands, and lift your upper body. Tuck your posterior in, and slowly slide forward into the lunge. You should stop sliding once you feel the stretch where the top of the leg joins the front of the hip. Hold for 30-60 seconds on each leg.
Other beneficial stretches for your hips include squats, lateral raises, deadlifts, and ball and pressure point stretch.
For optimal hip strengthening results, stretch before and after you ride your e-Bike.
A few words in conclusion
As you can see, there are many easy methods you can follow to prevent hip pain from happening or becoming exacerbated. Ensure that your e-Bike is fitted properly, that you are avoiding overdoing it and are riding comfortably with good posture, and that you are stretching your hip muscles – particularly the ones that are typically less engaged while e-Biking – in order to strengthen them. Then, you will be good to go!
Let us know how we are doing! Have another question or a recommendation for us? – reach us via this contact form.
Igor is a sustainable mobility and green energy advocate. His mission for Easy E-biking is to help make electric cycling simple, practical, and fun. Follow him on Facebook and LinkedIn.